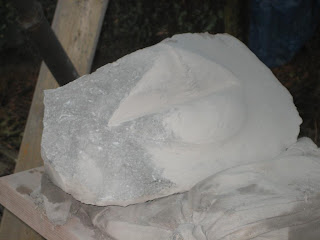
As promised, here a step by step report on the sculpting process...
The idea was to create a female body landscape that appears half submerged in water.
The mounting on a granite plate not only represents the water, but also allows mounting to the wall like a 3D picture.
The Sculpture is created from multiple stone slabs glued together from material that I already had.
Initial Puzzle to check which Slabs would fit where and allow for maximum sculpture size:Then I sketched on the rough outline - note the different drawing sketches on the left to keep the view for proportions in all dimensions.
Closeup of the scetches
Side view - already cut out the hips and roughly chipped out the next layers to get an Idea how it would look, positioned on the final granite plate.
After I did a layout of the figure, i glued together the slabs using special marble and stone glue on epoxy raisin base. Below the stone is a heater because this was done at about 5 degrees Centigrade. Left to dry overnight.
Next day. rough shape on side in red ink, to get an idea what can and had to be removed of the stone.
Parallel Cuts with a diamond cutting disk into the graniet (I thought I had Marble) allow for chipping away the blocks between the cuts.
Continue to Grind, saw, and chip to get a rough outline.
This is the point where some of the tooling gave up, Killed a side grinder in the process as well as diamond cutting disk and grinding disk.
With a Cup disk - also diamond tool I ground down the cutting marks. Lots of dust.
Other Angle , same state of progress.
More refinement lower end...
And if you are not carefull - a hard hit with a chisel - and the plates separated again.
And again ... very frustrating. The gray stuff you can see is the epoxy rasin.
A few more hours of grinding. you can see the lines where the stone slabs separated.
Closeup.cracks beteen the stone plates increased due to more epoxy.
First state of grinding and sanding down, still with the power tools. Had to get a special disk that could be used to grind instead of cutting and could handle the Granite.
Another BREAKDOWN...
Then I filled the lines with Glue / Epoxy again - to sand down later with smother edges.
Next I needed to Drill 4 holes in the statue, to fix it to the ground plate. During the drilling into the Granite the plates got separated - i lost count...
Another drying session...
Finally I could start sanding down the sculpture with Wet sandpaper. Where the stone is wet, the eventual color of the stone can be seen.
4 holes in the base plate - in line with the holes in the sculpture.
Polishing with Marbol, marble polish and wax - heat the stone to get smoother finish with the wax.
Finally - the bodyscape is done.
And 3 day's later it is mounted on the base plate - like the sunset off the "bottom"
Lighting is everything :-)
Since this will be showcased at the Vernissage in Belgium, and I can't drill holes in the wall to wallmount this 40plus kg "painting"... I had to create a temporary stand to display.
FInal setup - it rained - that's why the graniet plate is so dark...
Thank you - I hope you enjoyed this...
Feel free to comment or email me, and stay tuned or checkout the other posts.
Andreas


